Over the course of the first three installments of this blog, we have established a functional knowledge of the track parts available to us and how they fit together. Now it is time to start applying that knowledge to building a layout. Before we put pencil to (virtual) paper, much less lay down the first baseplate, there are a handful of questions to consider:
1 - What are your overall goals with having trains in your LEGO® setup? Are they the main feature, or just adding a moving party piece to another theme? This will help determine how much table space you want to allocate for the tracks themselves.
2 - Do you intend to play with the rest of the layout (I.E. minfigs, cars and trucks, spaceships, buildings, etc) or will everything aside from the trains be a static display? For instance, if you’d like to play with your road vehicles and buildings, you may want to consider NOT placing the main line of your tracks in between the edge of the table and the play area, lest you want your play time interrupted by a passing train every few seconds.
3 - Do you expect to run your trains realistically, or have them run in circles without needing much attention? This will help determine how simple, complicated, or realistic, you want your track plan to be.
4 - Do you own more than one train that will run on your layout? If so, do you want to store the trains in a visible part of the layout, a hidden section, or simply take the trains on and off the tracks as you like? The answer to this question will help you establish the number of storage sidings you’ll need, and where they should be placed.
5 - If you own multiple trains, do you want to run them simultaneously or have them take turns? Simultaneous running of multiple trains usually demands multiple independent loops of track, while running one train at a time needs only one main track and perhaps some sidings to store the trains not in use.
6 - How much space is available to you? What kind of tables do you plan to use? The space you have to fill with trains will be the strongest power dictating the design of your layout.
7 - Is this a permanent layout or will it need to be taken down and put away on occasion? A permanent layout can use fixed benchwork (a model railroading term for the structure and surface supporting the layout) while a temporary layout may wish to use tables that can easily be taken down and stored.
While this article won't directly answer each question for each individual reader, we'll try to cover all the possibilities to help you make informed decision. Thankfully, rebuilding a LEGO® setup is considerably easier than rebuilding a conventional model train setup, so mistakes are easy to correct and changes only take so long to complete!
We'll start by seeing how roads and buildings can fit together with our LEGO® Train tracks. Let's say we have one table to build our layout on: a 30 inch by 60 inch (76.2cm x 152.4cm) folding table, a size easily found at major retailers. As discussed in previous track planning series installments, LEGO® train tracks fit to a 5 inch (12.7cm) grid, so our layout will fit very neatly on this table. Note that there IS 4-stud border between the edge of the track and the edge of the table, which I like to keep in case of minor derailments. Track directly on the edge is more prone to being bumped, and derailments don’t have anywhere to go before hitting the floor!
Next, we'll add some 5"x5" baseplates (12.7cm x 12.7cm, or 16x16 studs) underneath the tracks to see how many squares our design takes up on the grid:
Note how on the curves, the 16x16 baseplates in each corner do not actually have track on them. You COULD place a small build in such a corner, but remember that the train will overhang the tracks by a couple of studs on the curves!
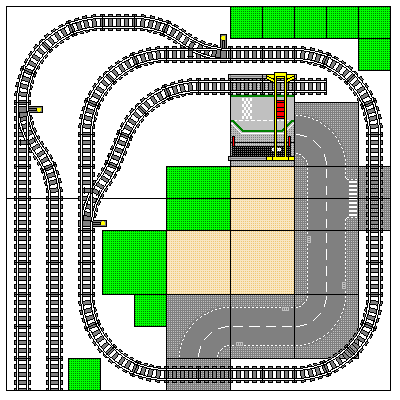
Finally, we'll add some road plates and modular buildings (represented by tan baseplates):
The Dark Bluish Gray baseplates are roads, the 16x32 plates underneath the tracks represent grade crossings. The tan baseplates are buildings, such as the Modular series. The green baseplates represent free space for other builds, such as some scenery in the form of foliage (although note that the corners touching the tracks will need to be clear). The white space is effectively unusable as it’s too close to the tracks.
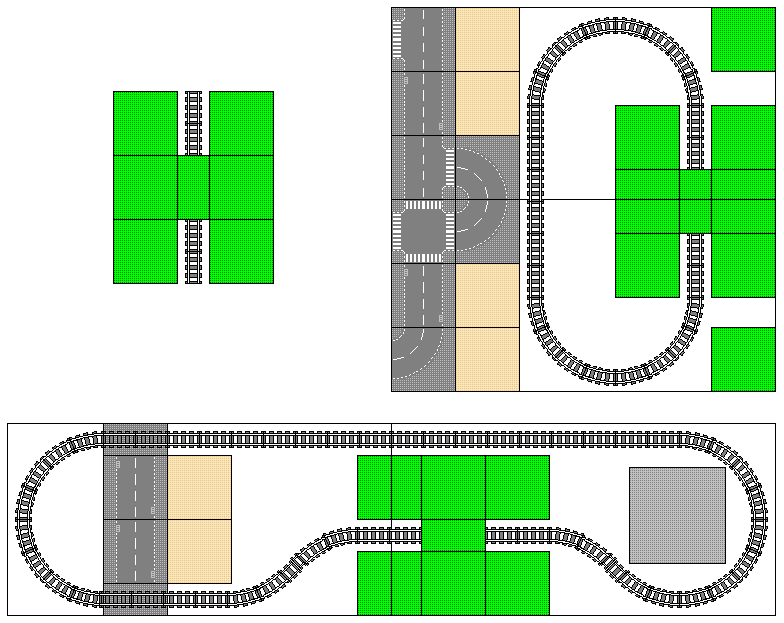
Unless you want to change from a layout with continuous operation (read: a complete circle of track), you will quickly find the 30”x60” table to be too small for a layout more complicated than a basic oval. Let’s add a second table to our setup, with which we can either form a square layout, a long and thin layout, or an “L” shaped layout. Below are some examples of each option. We’ll continue using the color-coding of dark bluish grey = roads, tan = buildings, green = scenery/available space, and white = space that isn’t all that usable. We’ll also add light bluish gray to represent other themes of LEGO®. The tables are shown as black outlines in Track Designer, while BlueBrick has a wide variety of tables that come standard with the software.
**IMPORTANT NOTE** Before you go placing three or four tables all squished together, be aware of the limits of your physical reach. That is, you don’t want to have something so far into the middle of the layout that you can’t reach it from the outer edges of the tables without damaging objects in between. 30 inches (76.2cm) is a reasonable reach-in for an adult, far less is advised if children will be playing with the trains. Even if you have a floor layout, be aware of the safe places to put your foot, should you need to access something towards the inside of the layout.


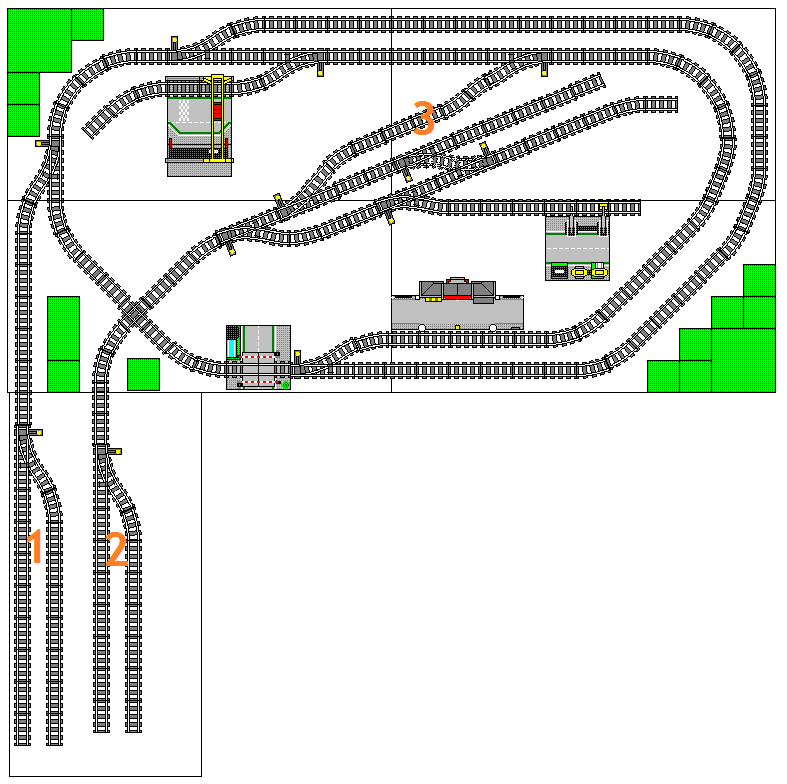
So far, our demonstration layouts have shown the possibilities of adding side tracks, buildings, roadways and scenery to our layouts. Let’s take these concepts a step further by introducing the idea of “Layout Design Elements,” or LDEs. In conventional model railroading, the term LDE originally referred to a prototype railroad location (such as a specific town, station, yard, siding, or industry) that is to be modeled as realistically as possible, with the same track setup, buildings, and proportions as are found on the original. This definition has become relaxed over the years, and can be taken to mean any chunk of layout that the builder would like to include with as few compromises as possible. Below are three examples of LEGO® LDEs, and some ways they can fit into a layout.


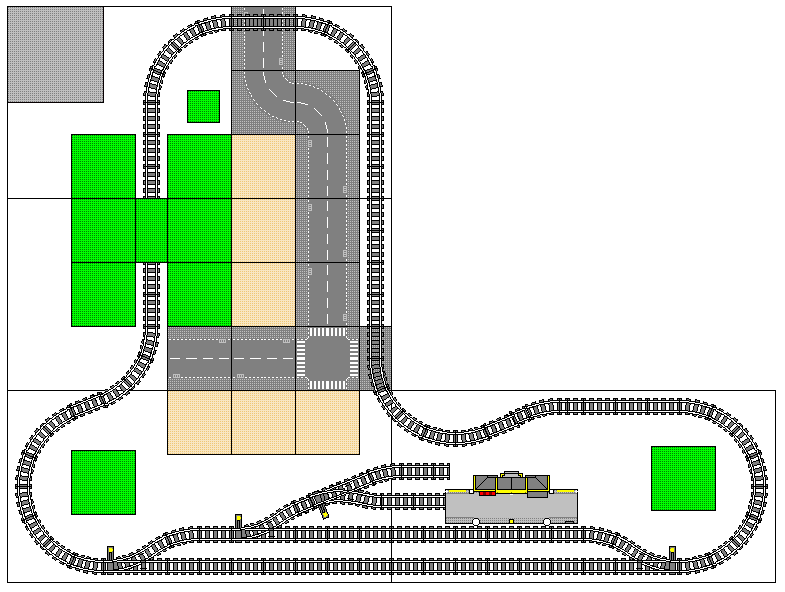
You may notice that the size of these example layouts is growing quickly. Unfortunately, for nearly all model railroad enthusiasts of every scale, space is at a premium. Whether you have a corner of a bedroom or an entire basement, it seems there just isn’t ever quite enough open area to build the train set of your dreams. Since this series on track planning is aimed at beginners, let’s assume you only have part of a bedroom available to set up your LEGO® trains. I have used my own 10 x 12.5 foot (roughly 3m by 3.8m) bedroom as a template. There is a door to the hallway in the upper right corner, the top wall is primarily made of folding doors for closets, and there is a window (not marked) along the bottom wall that we may not want to block with tables. I switched to the BlueBrick software for this set of images (except for the outline of my bedroom, which was hastily drawn in MS Paint), which gives us a grid of 10 inches (25.4cm, or 32 studs) grouped in sections of 3x3, because that 30”x30” (76.2cm x 76.2cm) space is the minimum area needed for a complete circle of standard LEGO® curved tracks. The first three images demonstrate how our two-table layouts could fit into the room, and the last image shows an example of what could be done if the ENTIRE room could be used for trains.


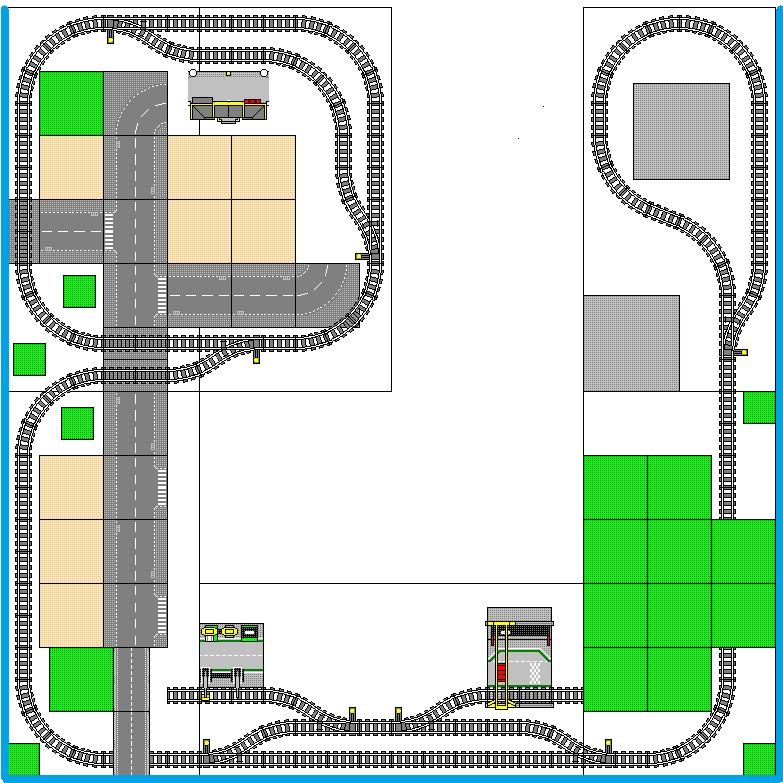
The “Whole Room” Layout in the last example above introduces a new style of layout we haven’t seen yet, called the “Around the Walls” layout. So far, most of the layout designs we’ve looked at have been “island” style, meaning that a complete circle runs more or less around the edge of the table “island.” For the last segment of this post, we’ll explore a few other styles of layout design, as well as a couple of new concepts that make them work. We already saw a Scene Divider in our example layout with the tunnel LDE; the tunnel helped to visually divide the layout into two distinct areas. Let’s take that idea a step further with the introduction of the “View Block.”
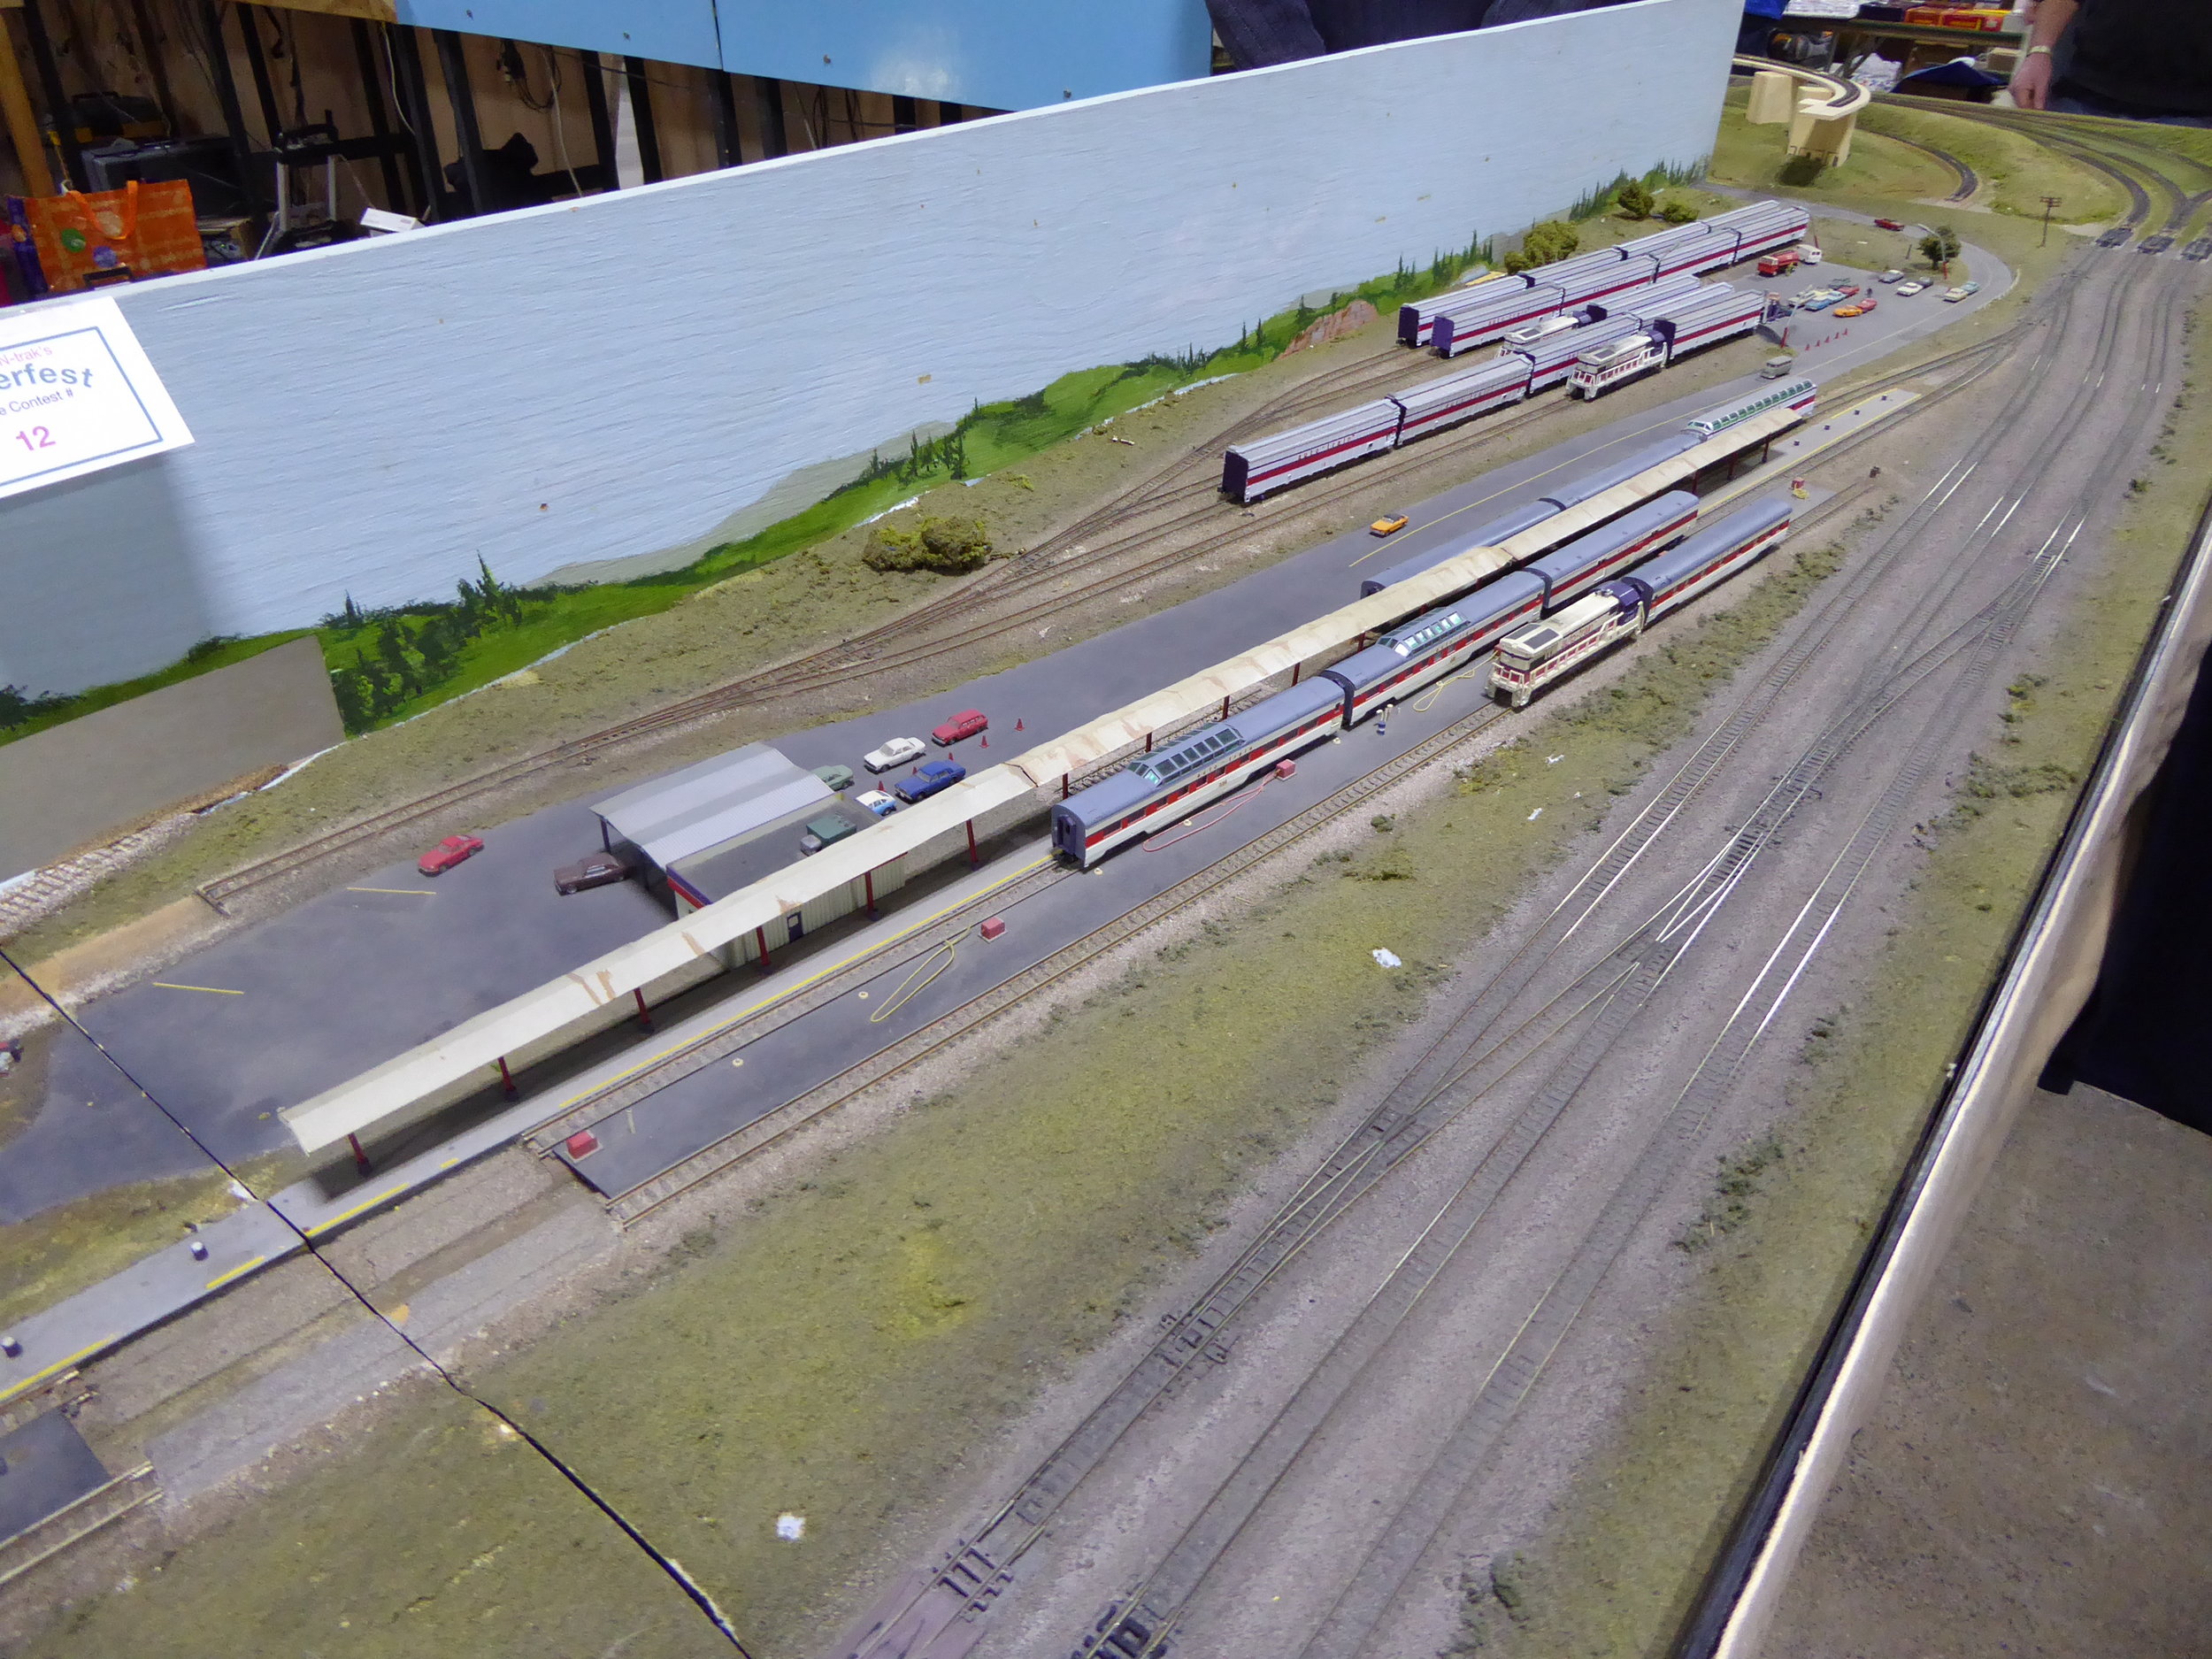
As its name suggests, the View Block prevents the person viewing the layout from seeing what’s on the other side, whether it be a wall, open space, more layout, or staging (we will define the term staging in a moment). The term “View Block” is roughly interchangeable with the term “Backdrop,” which refers to the view block as a piece of scenery. View blocks are typically made from a slice of wood, masonite, or styrofoam made to stand vertically. The backdrop can be painted onto them, or background photos could be printed or purchased and glued to the view block. All this COULD be done solely with LEGO® bricks, but that would likely be fragile and expensive. Here are some examples of View Blocks, all of which I photographed at the 2018 Amherst Hobby Show in West Springfield, Massachusetts.


As seen in the last photo above, “Staging” is typically an out-of-view area of the layout where trains are parked, waiting for their turn to run on the layout. It’s similar to the backstage wings of a theater, where performers wait for their turn in the spotlight. However, in the model railroading world, we don’t HAVE to hide our train-actors out of sight; we could park them in a visible freight yard, where they wouldn’t look out of place at all!
We’ll wrap up this 4th post of the Track Planning series by looking at a handful of example layouts that apply the new concepts we’ve learned. All of these example layouts use the 30”x60” (76.2cm x 152.4cm) table size in varying configurations. While you are welcome to copy these track plans directly for your own use, the goal here is to inspire you to design your own plan, based on your own desires, needs, and available space. Commercially available tables are entirely adequate for a LEGO® train layout, as LEGO® track isn’t usually nailed & glued to the table like regular model train track. You can even build your own tables if you like, although I personally do not have such skills, so I would recommend looking elsewhere for advice on building your own tables. Just remember that the minimum space needed for a half-circle of track on the grid is 30”x15” (76.2cm x 38.1cm) so be careful that you don’t select tables too narrow to fit the continuous loop of track you may want! Also remember to keep in mind your reach-in distance, and make sure there is ample aisle-way access to all areas of the layout arrangement.


If you haven’t read the previous installments of this series, they can be found by accessing the index page for this series. If you would like to be notified of when future installments in this series are posted, please follow me on my Facebook page or Instagram account. As always, thank you for reading!